Microsoft SQL Server now supports Linux. Since it has just come out of preview, I wanted to experiment installing SQL Server in Linux, and creating basic database operations as a practice. SQL Server 2017 on Linux currently supports SQL Database, SQL Server Agent and SSIS only.
Below is the summary on how to install SQL Server 2017 in Linux. We should have a machine with Red Hat Enterprise Linux 7.3 or 7.4 with at least 3.25 GB RAM to do the following exercises.
- Installing SQL Server: Login to Linux using a terminal such as Putty. Download the Microsoft SQL Server Red Hat repository configuration file by typing as below in the terminal.
sudo curl -o /etc/yum.repos.d/mssql-server.repo https://packages.microsoft.com/config/rhel/7/mssql-server-2017.repo
If you have already installed any previous versions of SQL 2017, you must remove the old repository before the above step by running the below command.
sudo rm -rf /etc/yum.repos.d/mssql-server.repo
Please refer to https://docs.microsoft.com/en-us/sql/linux/sql-server-linux-change-repo for details on removal of existing versions.
After downloading SQL Server Red Hat repository configuration file, run the following command to install SQL Server.
sudo yum install -y mssql-server
Next, configure SQL Server as follows:
sudo /opt/mssql/bin/mssql-conf setup
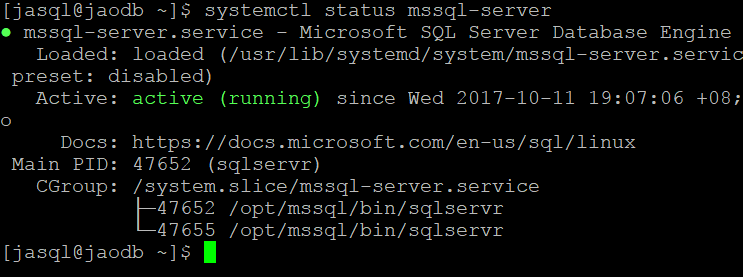
Please select Developer edition or Evaluation edition (used for learning purposes) when prompted. Also enter a strong password for sa. Once configured, run the below command to verify whether SQL server service is running or not.
systemctl status mssql-server
You will see as below.

Run the below commands to allow remote connections by enabling port 1433 on the firewall on RHEL.
sudo firewall-cmd --zone=public --add-port=1433/tcp --permanent
sudo firewall-cmd --reload
Now, SQL Server is ready.
If we create any SQL databases, they will get created in the default folders specified with the installation. We can modify the data directory (where SQL server MDF files will be created), log directory (where LDF files will be created), default backup directory and the default data dump directory. Let’s modify them before creating any databases.
The example shown below assumes that there are already created folders named data, log, dump and backup in /u03/sql2017. Please change the folder paths according to your folder structure before running the following commands.
sudo chown mssql /u03/sql2017/data
sudo chgrp mssql /u03/sql2017/data
sudo /opt/mssql/bin/mssql-conf set filelocation.defaultdatadir /u03/sql2017/data
sudo chown mssql /u03/sql2017/log
sudo chgrp mssql /u03/sql2017/log
sudo /opt/mssql/bin/mssql-conf set filelocation.defaultlogdir /u03/sql2017/log
sudo chown mssql /u03/sql2017/dump
sudo chgrp mssql /u03/sql2017/dump
sudo /opt/mssql/bin/mssql-conf set filelocation.defaultdumpdir /u03/sql2017/dump
sudo chown mssql /u03/sql2017/backup
sudo chgrp mssql /u03/sql2017/backup
sudo /opt/mssql/bin/mssql-conf set filelocation.defaultbackupdir /u03/sql2017/backup
sudo systemctl restart mssql-server
- Now, installation and configuration of SQL 2017 databases in Linux are complete. we can install command line tools in Linux to connect SQL Server.
Run the below command to Download the Microsoft Red Hat repository configuration file.
sudo curl -o /etc/yum.repos.d/msprod.repo https://packages.microsoft.com/config/rhel/7/prod.repohttps://packages.microsoft.com/config/rhel/7/prod.repo
If you have any previous versions of mssql-tools installed, remove any older unixODBC packages by running the following command:
sudo yum remove unixODBC-utf16 unixODBC-utf16-devel
Now, run the below commands to install mssql-tools.
sudo yum install -y mssql-tools unixODBC-devel
Set the path variable as below.
echo 'export PATH="$PATH:/opt/mssql-tools/bin"' >> ~/.bash_profile
echo 'export PATH="$PATH:/opt/mssql-tools/bin"' >> ~/.bashrc
source ~/.bashrc
You can connect to sqlcmd with the following commands:
sqlcmd -S localhost -U SA -P '<sa Password>'
Type Quit to exit from sqlcmd.
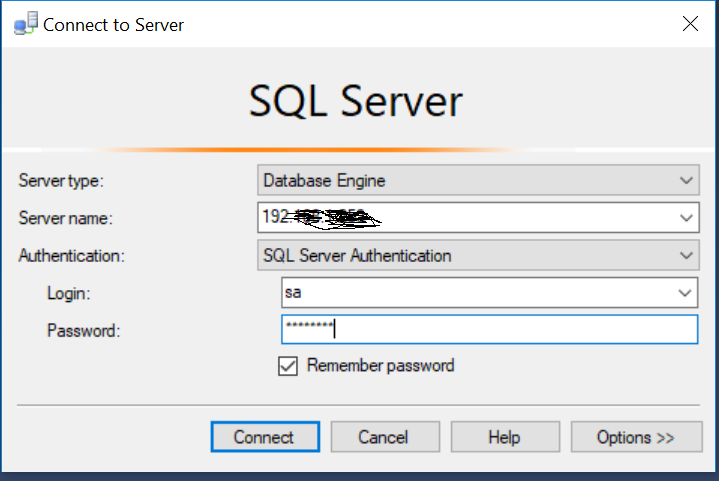
Further, we can connect to the above installed SQL Server in Linux from SQL Server Management Studio (SSMS) from a Windows machine using the Linux machine IP address. We should use SQL authentication to connect.

Connecting using SSMS enables us to view and manipulate all objects in SQL server 2017 installed in Linux easily. Please refer https://docs.microsoft.com/en-us/sql/linux/sql-server-linux-develop-use-ssms for any details on connectivity with SSMS.
Let’s test SQL Server database by creating a database and a table. Login to SQLCMD as explained before.
sqlcmd -S localhost -U SA -P '<sa Password>'
Type your SQL commands followed by “GO” statement to execute.
CREATE DATABASE TestDB
GO
This creates a database. Let’s create a table in the TestDB as below.
USE TestDB
CREATE TABLE Inventory (id INT, name NVARCHAR(50), quantity INT)
INSERT INTO Inventory VALUES (1, 'banana', 150); INSERT INTO Inventory VALUES (2, 'orange', 154);
Go
Once execution of the above is complete, let’s run a SELECT command to test.
USE TestDB
SELECT * FROM Inventory WHERE quantity > 152;
Go
You can type QUIT and enter to exit from SQLCMD.
Let’s see now how we can backup the above database with SQLCMD.
sqlcmd -H localhost -U sa -P '<Enter SA Password here>' -Q "BACKUP DATABASE [testdb] TO DISK = N'/u03/sql2017/backup/testdb.bak' WITH NOFORMAT, NOINIT, NAME = 'testdb-full', SKIP, NOREWIND, NOUNLOAD, STATS = 10"
Please change the backup folder path (bolded above) appropriately. You can verify the backup location using Linux commands after the backup operation has been completed.
To restore the above backup, please execute the below command after modifying the backup location as per your folder structure. This will replace the existing database.
sqlcmd -H localhost -U SA -P '<Enter SA Password here>' -Q "RESTORE DATABASE [testdb] FROM DISK = N'/u03/sql2017/backup/testdb.bak' WITH FILE = 1, NOUNLOAD, REPLACE, STATS = 5"
- Let’s install SQL Server Agent in Linux as per https://docs.microsoft.com/en-us/sql/linux/sql-server-linux-setup-sql-agent. SQL Server Agent helps to schedule and execute jobs. Currently it supports only limited types of tasks. Currently, it does not support any SSIS or SSAS activities. However, Microsoft will improve its capabilities gradually.
The unsupported areas are listed in “Unsupported Services and features” section of SQL Server Agent in the below link.
https://docs.microsoft.com/en-us/sql/linux/sql-server-linux-release-notes
For new installations of SQL Server Agent, run the below command.
sudo yum install mssql-server-agent
sudo systemctl restart mssql-server
To upgrade any existing versions of SQL Server Agent please run the following command.
sudo yum check-update
sudo yum update mssql-server-agent
sudo systemctl restart mssql-server
- SQL Server 2017 in Linux supports SQL Server Integration Services (SSIS) with limited capabilities. (https://docs.microsoft.com/en-us/sql/linux/sql-server-linux-setup-ssis)
To install SSIS on RHEL execute the below commands.
sudo curl -o /etc/yum.repos.d/mssql-server.repo https://packages.microsoft.com/config/rhel/7/mssql-server-2017.repo
This will Download the Microsoft SQL Server Red Hat repository configuration file. Now, to install SSIS, run the below command.
sudo yum install -y mssql-server-is
To configure, SSIS below command should be executed.
sudo /opt/ssis/bin/ssis-conf setup
Finally, update the path variable.
export PATH=/opt/ssis/bin:$PATH
If you already have SSIS, you can run the below command to update to the latest.
sudo yum update mssql-server-is
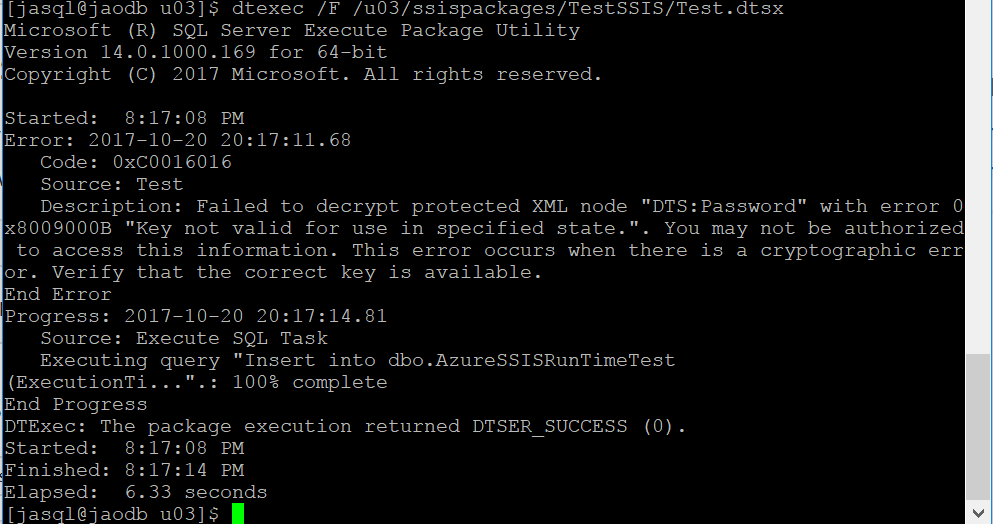
Currently, SSIS supports only file based deployments. Thus, let’s create a sample SSIS package using SQL Server Data Tools (SSDT) in Windows, and copy to Linux machine. Run the below command to execute an SSIS package.
dtexec /F <Full path with the package name>
e.g. dtexec /F /u03/ssispackages/TestSSIS/Test.dtsx
If the package is protected with a password you should provide it along with the below command with /DE <Password>.

To schedule SSIS packages in Linux, we cannot use SQL Server Agent. We should use Linux system scheduling tools such as CRON. https://docs.microsoft.com/en-us/sql/linux/sql-server-linux-schedule-ssis-packages
SQL Server in Linux is quite new and not yet popular. If anybody is using basic ETL with SSIS and SQL Server, this version of SQL Server 2017 can be used to migrate to Linux without having to rewrite their ETLs in another tool.
As this is a first gen release, it supports only database, SQL Server Agent and SSIS with some limitations, compared to SQL Server in Windows. However, I am enthusiastic that this will improve over time.


